Showing posts with label series: iron man. Show all posts

12 May 2013

Tutorial: Iron Man Mark 25 Inspired Eye Make-up

It's that time again! Yup, I have another Iron Man inspired pictorial. I had this one planned ever since I saw the movie, it was just the matter of trying to figure out what Mark it was. I'm still not entirely certain, but I went with the Mark 25.

Courtesy of Google
If you look at the official Iron Man 3 game, the Mark 25 is mainly a dark charcoal/blue hued suit that has a vivid green arc reactor installed, not your typical arc reactor as it appears as a thin-ish slit in the chest plate. The eyes and accents on the helmet though also glow the same vivid green. Not to mention there's also yellow/gold to the armor as well. I originally thought the suit I saw in the movie (briefly), that it was a different suit, couldn't find any images of what I thought I saw, so the yellow/gold comes at the very end of the tutorial.

Started off with two bases. I wanted to make sure that green popped and the charcoal was dark enough. I put Pixi's Shell Sheen along the lash line of my lid, along the inner corner and half way along my lower lash line on the bottom. Then taking Pixi's Brun Beam Everywhere else up to the crease and the other half of the lower lash line. I tried to blend in, but both had already dried. Erk!

Next up, the green! After going through all my greens and not really finding that "neon green" color, I ended up finding this one from Wet n Wild from the I Dream of Greenie trio shadow set. It's the Eye Lid color. Super duper soft shadow that breaks all over the place when I close the lid. Anyway! I placed it all over the area where I placed shell Sheen, leaving the very inner corner bare. Also took it along Shell Sheen on the lower lash line. I went over this a few times to get it really vivid.

The charcoal next! I used e.l.f. Baked Eyeshadow in Dusk, placing it where Brun Beam is. Also taking it along Brum Beam on the lower lash line, meeting it with the Green from above. I then went over the green again.

For the inner corner, I didn't use the blue shift from Aura as I normally would, being the arc reactor is green, I stuck to the I Dream of Greenie trio, and used the light green labeled Brow Bone. Blending it a little bit into Dusk.

Taking South from Urban Decay's Glinda palette, I blended that into the crease and above. To blend out South, I used Illusion (not pictured) from the same palette.

Two black liners like from the last pictorial. I tight lined my upper lash line using Studio Gear Invicible Gel Liner in Invincible Onyx, then to line my lower water line, I used Rimmel London's Blackmail.

After that for Mascara I used e.l.f. Volume Plumping Mascara on the upper and lower lashes. 

A minor tweek that I did was add in a yellow to the inner corner, for this I used the Brow Bone from Wet n Wild's Bright Idea trio. End Result?


Products Used
  • PIXI Lid Last Shadow Pen in Shell Sheen
  • PIXI Lid Last Shadow Pen in Brun Beam
  • I Dream of Greenie from Wet n Wild
  • Baked Eyeshadow in Dusk from e.l.f.
  • South from Urban Decay Glinda Palette
  • Bright Idea from Wet n Wild 
  • Illusion from Urban Decay Glinda Palette
  • Studio Gear Invincible Gel/Cream Eye Liner in Invincible Onyx
  • Rimmel London Scandaleyes Shadow Stick in Blackmail
  • e.l.f. Volume Plumping Mascara

04 May 2013

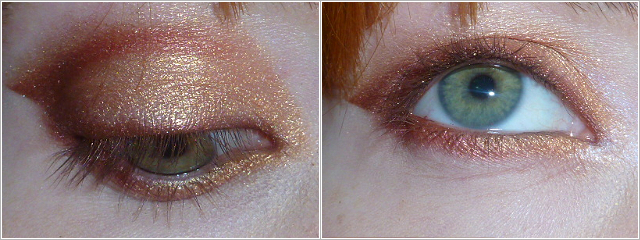
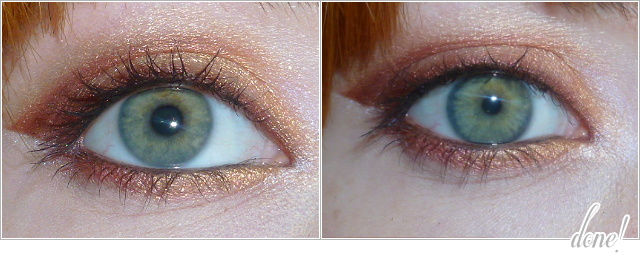
Red and Gold: Iron Man 3

Yes! I got back from seeing Iron Man 3, no worries won't go into a review or anything. My Iron Man Inspired series will continue as I saw an Armor in the movie (not sure of the Mark) that I want to try and do a tutorial for.

I wanted to do a quick post of what look I ended up going with for today, before I have to head off to work.

Nails
This is actually the simple form of what I wanted to do. The polish did NOT want to dry. I even did the running the nails under ice cold water to try and speed up the process so I could put the guides on for the half moons. Didn't work. Used a guide on my pinky and ring finger the gold polish started to pull up. So 8 out of 10 fingers had the half moons done by hand. These are actually the two polishes that I used for the other two Iron Man movies as well. They represent the armor well!

Polishes Used
  • Sally Hansen Hi-Definition Hail Color in Lite
  • Color Club in Warming Trend

Modified the Suitcase Armor look that I did here, just switched out the silver for gold and added in the blue shift of Aura from Urban Decay.

Products Used
  • PIXI Lid Last Shadow Pen in Peach Pavé
  • Rust from NYX
  • Crown & Sceptre from MAC (LE)
  • Family Treasures from MAC (LE)
  • Aura from Urban Decay Glinda Palette
  • OZ from Urban Decay Glinda Palette
  • South from Urban Decay Glinda Palette
  • Illusion from Urban Decay Glinda Palette
  • Studio Gear Invincible Gel/Cream Eye Liner in Invincible Onyx
  • Rimmel London Scandaleyes Shadow Stick in Blackmail 
  • Studio Gear Impactfull Pro T.L.S. Mascara

01 May 2013

Tutorial: Iron Man Suitcase Armor Inspired Eye Make-up

I'm baaack! I'm still trying to figure out what to do with the other armors, but for now I'm doing a tutorial using the Mark V or the Suitcase Armor as inspiration.


If you've seen Iron Man 2 then you'll be familiar with the Suitcase Armor that Tony dons while under attack by Ivan Vanko. It's primary color is the metallic red (candy apple red as mentioned in the first movie) and silver/chrome. I did throw in a third color, mainly representing when the armor is heavily damaged by Vanko.

So lets get on with the tutorial!

Started off by using PIXI Peach Pavé as the base for the shadows.

Taking a pencil brush and using NYX Rust as one half of the "Candy Apple Red", I went along the crease, basically doing a blended cut cease if that makes sense. Not pictured is that I took it slightly along the lash line. I also took Rust along one half of the lower lash line.

Next the other half of the "Candy Apple Red", I used MAC Crown & Sceptre. Rust has a pinky tone to it so I wanted to cover that up by using a more muted metallic red. Which I think Crown & Sceptre does the trick. I just went over where I put Rust.

For the Silver/Chrome part, again, I used two different shadows. Starting off with MAC Melt My Heart as the base silver. I just filled in and blended the edges of both reds together with Melt My Heart. Taking this down along the lower lash line as well, filling in the other half.

The second silver I used which gives off more of a, chrome-esque, appearance is the silver side of OZ from Urban Decay. I just went over Melt My Heart, but with Oz I patted it on more so then blending. After putting that in place, I went over Crown & Sceptre again making sure that it stood out against the silver.

The Suitcase Armor gets heavily damaged by Vanko, and I wanted to somehow put a color in to represent the damage. Probably not the greatest representation of it, but I used South from Urban Decay above the crease. Again, I went over Crown & Sceptre.

For some reason my camera likes to blow this one out. But for the brow bone and to blend out the harsh line I created with South, I used Illusion from Urban Decay and a Missha fluffy brush. I think it's the blending brush.

Two part eyeliner. I used Studio Gear Invicible Onyx Gel/Cream Liner for tight lining. Then used Blackmail from Rimmel London on my lower water line. Optional, add wing liner! I'm still trying to get the hang of that, which is why I haven't done it.

After that (not pictured) I used the new mascara from Revlon, Lash Potion. Two coats to the upper lashes and a coat to the lower lashes. I probably should have curled my lashes, but I didn't want to run downstairs and try to dig out my curler ;x


Products Used
  • PIXI Lid Last Shadow Pen in Peach Pavé
  • Rust from NYX
  • Crown & Sceptre from MAC (LE)
  • Melt My Heart from MAC (LE)
  • OZ from Urban Decay Glinda Palette
  • South from Urban Decay Glinda Palette
  • Illusion from Urban Decay Glinda Palette
  • Studio Gear Invincible Gel/Cream Eye Liner in Invincible Onyx
  • Rimmel London Scandaleyes Shadow Stick in Blackmail
  • Revlon Lash Potion Mascara

19 April 2013

Tutorial: Iron Man Mark 42/47 Inspired Eye Make-up


Red and gold time! Took me a little bit to figure out which Mark this was because I hadn't seen it anywhere despite it being the main armor in Iron Man 3. So far I've seen it as Mark 42 (XLII) and Mark 47 (XLVII). Can be that Mark 47 is simply the latest model of Mark 42. Ok, who's confused now? Raise your hand! I'm just going to call it Mark 42/47 to avoid confusion. 

The primary color for this armor is the gold, with the metallic "hot rod" red becoming an accent color. That's what I tried to do with this inspired look. Hopefully, it came out well. I was rather please with it at least!

Mark XLII/XLVII
1. To start, I primed my eye first using Milani Eyeshadow Primer. Then placed scotch tape, under my lower lashes at the corner of my outer eye so that I could get a nice crisp line. I did take some of the tackiness away by sticking the tape to the back of my hand twice.

2. Urban Decay Twice Baked. I wanted the red that I was going to use to be dark enough, so I start off with a base shadow. Using Twice Baked, I creased the "wing" then blended it into the crease, outer V and then smudged it along the lash line going all the way to the inner corner.

3. NYX Rust. In years past for Iron Man, I've always used Rust as the "hot rod" red, although it really isn't as metallic-y as I would like, it works fine though. I packed this on over Twice Baked, making sure all the brown was covered up.


4. I then removed the tape, getting the nice crisp line that I wanted. Going to Rust again, I smudged that along the lower lash line.

5. For the next steps, I used two different golds. First using Urban Decay Half Baked. I started filling and blending in the bare area going from the outer corner inward.

6. I then went over Half Baked with the gold half of Urban Decay OZ; taking both Half Baked and OZ down along the inner portion of the lower lash line, connecting them both to Rust and blending.

7. Because both Gold colors kind of washed out Rust, I went over again, with Rust to get the red to stand out again. I combined Rust with NYX Pearl Mania in Penny which is similar to Rust, but more glittery. I also took Gold OZ up above the crease, blending it from the tip of the wing around to the inner corner. I then used Illusion from Urban Decay to blend OZ upward.

8. For the inner highlight, I took (again for the Iron Man series!) the white blue shift of Aura from Urban Decay. Not pictured here is that I also took Aura and ran it along the underside of the wing to highlight it.

9. Liner time! I first used Rimmel London Scandaleyes in Blackmail, smudged it into my upper waterline and along my lower waterline. After that I took a very flat, straight eyeliner brush, loaded it with Studio Gear Invincible Onyx eyeliner and gingerly ran it along my lash line.

10. Last, but not least. Mascara!!! I used Studio Gear Impactfull Pro T.L.S. mascara (review coming). Two coats to the upper lashes, then coated the lower lashes. Then, you're done!

Products Used
  • Milani Eyeshadow Primer
  • Urban Decay Twice Baked
  • Urban Decay Half Baked
  • NYX Rust
  • NYX Ultra Pearl Mania Penny
  • Urban Decay OZ
  • Urban Decay Aura
  • Urban Decay Illusion
  • Studio Gear Eyeliner in Invincible Onyx
  • Rimmel London Scandaleyes in Blackmail
  • Studio Gear Impactfull Pro T.L.S. Mascara


15 April 2013

Tutorial: Iron Man Mark 40 Inspired Eye Make-up


So, when I was planning on doing the second Iron Man tutorial, I was originally working with the Mark 2 design. That, however, is practically a chrome look... not exactly inspiring, at least for me. So, when the image of the Mark 40 was released on Facebook, the "Shotgun" armor, I went with that one. Really this could go with any of the silver/chrome/metal looking armors though.
 
This is actually the first time I'm doing anything like this, so I'm going out of my comfort zone, but I'm trying.
 
Mark 40 Hyper Velocity Suit "Shotgun"
 
1. I used Maybelline Color Tattoo in Tough as Taupe as my base. I knew I wanted to "wing" the color of the eye, I used the old scotch tape trick so I could get a straight edge. Extending Tough as Taupe out using an angle brush.
2. Next up, outlining. Using a straight edge liner brush, I gently outlined the crease of the eye using MAC's Carbon. First shot I used an angle liner brush and didn't like the results. I didn't line the entire crease, I skipped over the center, so basically I only lined or cut the edges of the crease.
 
3. Being this is based on Mark 40 which seems to have a slightly blue metal look to it. I used e.l.f. Baked Eyeshadow in Dusk and a flat eyeshadow brush to blend Dusk starting from the crease down, not bringing it down all the way, but fading it down. I tried not to disrupt Carbon as I want the black to stand out. I also didn't bring Dusk out onto the little "wing" that I creased, I simply shaded the outer v of the eye avoiding the other area (does that make sense?).
 
4. Taking Melt My Heart from MAC, I blended it in all over the lid, blending it into Dusk, then going back over with Dusk to make sure that deeper steel blue shade can be seen.
 
5. Of course I can't be happy with just one silver. I really wanted the silver to pop so I took the silver side of Urban Decay's OZ and went over Melt My Heart. Also here, I remembered about my lower lash line. I took the flat liner brush and went half way, as close to my lash line as I could, with MAC Carbon. Then took Melt My Heart along the rest of the lower lash line, also taking it under Carbon, then I repeated the process with the silver side of OZ.
 
6. Taking Rimmel London's Scandaleyes Shadow Stick in Blackmail, I smudged that into my upper lash line then along my lower water line. Feel free to add liner. I still haven't gotten the hang of it, which is why I normally smudge liner onto my upper water line.
 
7. For mascara I used e.l.f. Volume Plumping Mascara, upper and lower lashes. And then, done!

Next one is definitely going to be one of the red and gold armors.

And of course, I forgot to take a photo of the products used. Luckily, most appear in the still photo tutorials ;x

Products Used
  • Maybelline Color Tattoo in Tough as Taupe
  • OZ from the Urban Decay Glinda Palette
  • E.L.F. Baked Eyeshadow in Dusk
  • Carbon from MAC
  • Melt My Heart from MAC
  • Rimmel London Scandaleyes Shadow Stick in Blackmail
  • E.L.F. Volume Plumping Mascara

07 April 2013

Tutorial: Iron Man Mark 1 Inspired Eye Make-up


Raise your hand if you knew this was coming! No? Darn. Well, if you know me, then you'll know I'm a massive fan of Iron Man. Comics, cartoon, anime, movies.

Anytime I went to the movies for either the first, second or even the Avengers movie, I've always done my makeup and nails up. Hope I'm not the only one out there that does this haha.

Now that I have the blog, I figured with Iron Man 3 set to come out May 3rd (27 days!), I'm going to give a shot at doing a series that's been inspired by the suits of armor. 

So to kick off the series (should there be a name for it?), I'm starting with the Mark 1. This suit of armor is the bulk armor that Tony builds in a cave during the first movie. It's very grunge-y, steel and metal. 

Photo courtesy of Google
Tony Stark was able to build this in a cave! With a bunch of scraps! 
 
 
First off, bare eye. Then I used Milani Eyeshadow Primer all over the lid.

Then, taking the White with blue shift of Aura from the Urban Decay Glinda palette, I applied that to the inner corner. With that blue hue to it, I figured it would serve the purpose of representing the arc reactor's glow.

Next, I decide to give a cut crease a try. First time doing this. I used E.L.F. Baked Eyeshadow in Dusk, which is a charcoal grey with shimmer, to map out the crease.


Then I went over Dusk, with MAC's Carbon, a matte black. More or less concentrated it on the outer V.

After that I began to do the fill in. I started off with the silver side of OZ from the Glinda palette, placing it next to Aura. I stopped OZ at the center of the lid.

Next to OZ, and for the rest of the fill in I used MAC's Melt My Heart.

I then took Dusk again and started to blend it into Melt My Heart, to deepen it a bit more so it wasn't a stark silver. I also went over the cut crease again with Carbon to reemphasize it again.

Next comes eyeliner. I used my Elite Models Intensity Eyeliner in Secret Grey and smudged it into my upper lash line and waterline. Optional, black eyeliner instead. Also optional, liquid liner. I'm still trying to get the hang of liquid eyeliner via the felt tip pens I have, hence why I haven't done it.

Finally, used my E.L.F. Volume Plumping Mascara, two coats. I also placed it on my lower lashes as well.


Products Used:
  • Milani Eyeshadow Primer
  • Aura from the Urban Decay Glinda Palette
  • OZ from the Urban Decay Glinda Palette
  • E.L.F. Baked Eyeshadow in Dusk
  • Carbon from MAC
  • Melt My Heart from MAC (LE I believe)
  • Elite Models Intensity Eyeliner in Secret Grey
  • E.L.F. Volume Plumping Mascara
Related Posts Plugin for WordPress, Blogger...